In data centers and office environments, network cabinets are essential facilities for storing and protecting servers, routers, switches, and other network equipment. A properly installed and configured network cabinet can not only effectively organize and manage equipment but also improve equipment safety and heat dissipation. For many IT professionals and equipment administrators, understanding how to correctly install a network cabinet is crucial.
This article will guide you through the network cabinet installation process, helping you successfully complete the installation from scratch.
1. Preparation
Before starting the network cabinet installation, some preparatory work is needed to ensure a smooth installation process:
(1) Choosing the Right Cabinet Type
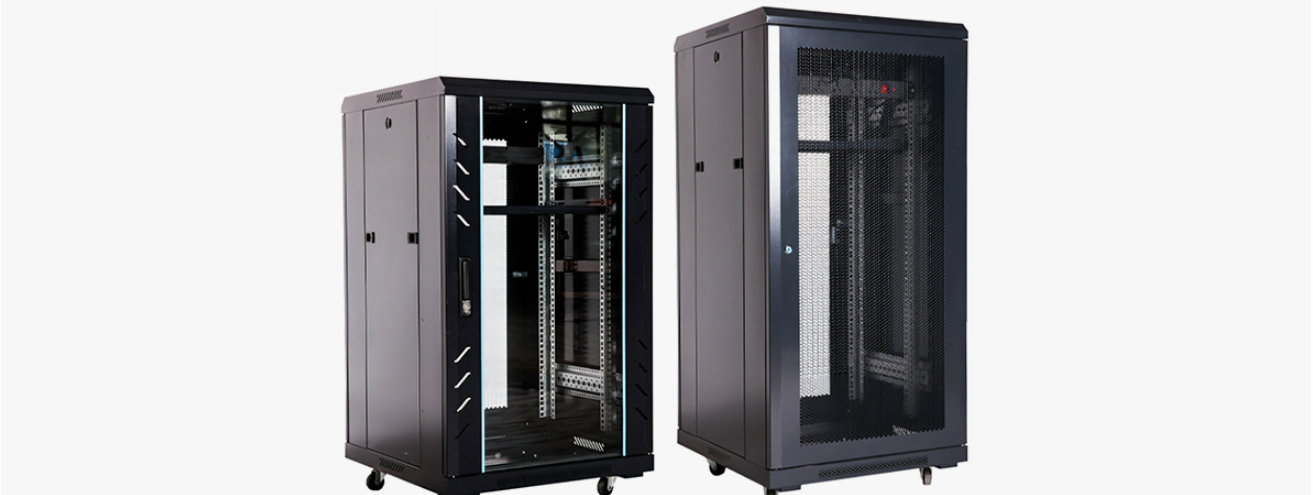
Choosing the right network cabinet is crucial before installation. There are two main types of network cabinets commonly found on the market: floor-standing cabinets and wall-mounted cabinets.
Floor-standing cabinets: Suitable for larger equipment and network configurations requiring more space. They usually come with adjustable racks and are suitable for situations with greater height and more equipment.
Wall-mounted cabinets: Suitable for small offices or places with limited space, usually used to store a small number of devices, such as small routers and switches.
(2) Determining the Cabinet Placement
When choosing the cabinet placement, the following factors should be considered:
Sufficient space: Enough space should be left around the cabinet for future equipment additions or maintenance.
Air circulation: Ensure sufficient air circulation around the cabinet to prevent equipment overheating.
Power access: The cabinet should be close to a power outlet to provide a stable power supply for the equipment.
Weight distribution: During installation, consider the cabinet's load capacity and the weight distribution of the equipment to avoid unnecessary pressure on the floor.
(3) Required Tools and Materials
Screwdriver, wrench: Used to fix the cabinet and equipment.
Level: To ensure the vertical or horizontal position of the cabinet.
Electric drill: Used for drilling holes, especially when installing wall-mounted cabinets.
Cabinet mounting screws and fixing accessories: Prepare the screws and accessories according to the cabinet model.
2. Network Cabinet Installation Steps
(1) Inspect Packaging and Cabinet Components
Before starting the installation, first check the cabinet packaging and all components to ensure that all parts are complete and to avoid any omissions during the installation process. The cabinet usually consists of multiple parts, including the cabinet frame, doors, side panels, back panel, racks, and support feet. Refer to the instruction manual to confirm the assembly sequence of each part.
(2) Installing the Cabinet Frame
Installing the cabinet frame is the most important step in the entire installation process. Depending on the type of cabinet, the frame can be a single base or have supporting legs. Generally, the assembly sequence of the frame is as follows:
First, connect the base to the uprights, ensuring that each support column is securely fixed to the base. Screws can be used to secure each connection point to ensure the stability of the cabinet.
Use a spirit level to check if the cabinet is level. Ensure that the cabinet frame is placed horizontally on the ground.
If it is a floor-standing cabinet, the support feet can be installed first, and then check that the adjustment of the support feet is appropriate to ensure the stability of the cabinet.
(3) Installing Side Panels and Back Panel
Next, install the side panels and back panel of the cabinet. The side panels and back panel provide additional protection for the cabinet and prevent external interference.
Connect the side panels to the cabinet frame. Place one side first, ensuring it is aligned before securing it with screws.
If the cabinet has a back panel, fix the back panel in a similar manner, ensuring the security of the fixing points.
(4) Installing Door Panels and Locks
The cabinet door panels are generally divided into front and rear doors. The front door is usually transparent for easy observation of the equipment inside the cabinet, while the rear door can be made of metal or glass.
Attach the front and rear doors to the hinges, ensuring that the doors open and close smoothly.
If the cabinet is equipped with locks, install the locks according to the instructions and ensure that the door locking function works properly.
(5) Securing the Racks
The racks inside the network cabinet are usually used to install servers, switches, routers, and other equipment. Special attention should be paid to the security of the rack installation to ensure that the equipment does not shake during operation.
Adjust the installation position of the racks according to the height and width of the cabinet. Typically, the rack position can be adjusted up and down to accommodate equipment of different heights.
Secure the rack inside the cabinet with screws to ensure its stability.
(6) Arranging Equipment and Cables
After the cabinet frame and equipment brackets are installed, begin placing the various devices into the cabinet. Arrange the equipment rationally according to the type and size of the devices.
Equipment installation: Place servers, routers, switches, and other equipment into the rack and secure them with screws. Ensure that the installation location of the equipment does not obstruct ventilation inside the cabinet.
Cable management: Use cable management trays or cable ties to organize the cables neatly and prevent tangling. Cable management not only helps improve the tidiness inside the cabinet but also helps optimize the cabinet's heat dissipation.
(7) Ensuring Good Heat Dissipation
After the equipment is installed, ensure that the airflow inside the cabinet is unobstructed. Additional fans or a dedicated cooling system can be installed to ensure that the equipment maintains a suitable temperature.
Installing fans: Install fans at the top or bottom of the cabinet to improve airflow.
Checking ventilation openings: Ensure that the cabinet's ventilation openings are not blocked by cables or other objects to ensure smooth airflow.

3. Post-Installation Inspection and Testing
(1) Checking Cabinet Stability
After installation, first check the stability of the cabinet, ensuring that all screws are tightened and that the cabinet is placed stably on the ground.
(2) Equipment Power-On Test
Connect the power and turn on the equipment, checking that the equipment is working properly. In particular, check that network devices, switches, routers, etc., start up smoothly and connect to the network.
(3) Monitoring Temperature
Monitor the temperature of the equipment inside the cabinet to ensure that the cooling system is functioning correctly. If the temperature inside the cabinet is too high, it may be necessary to improve ventilation or install more fans.
(4) Organizing Cables
Check that the cables are neatly organized to prevent excessive clutter from affecting airflow. Cable management strips or cable ties can be used to secure the cables.


")
")


We are a company mainly engaged in the manufacturing of network cabinet , charging cart and other infrastructures.
Product Classification
Address
No.12 Fushan Road,Guanhaiwei Town,Cixi City,Ningbo,Zhejiang,China
PHONE
+86-17857397994
 English
 عربى
عربى
 Español
 русский